How to Use HandsDrop: A Plain-Language Walkthrough from Sign-Up to First Order
Sellers trying Handsdrop for the first time usually come with the same few questions: How is it different from standard dropshipping? Do I have to design products myself? Is the process complicated?
The setup is not complicated, but Handsdrop does differ from typical POD platforms in a few important ways. Understanding them in advance will make the process smoother once you install the app.
If you sell on Etsy, Amazon, or another platform or independent site, please refer to 《Handsdrop for Non-Shopify Users: Complete Setup Guide》 for the integration path that applies to you.
What Handsdrop does
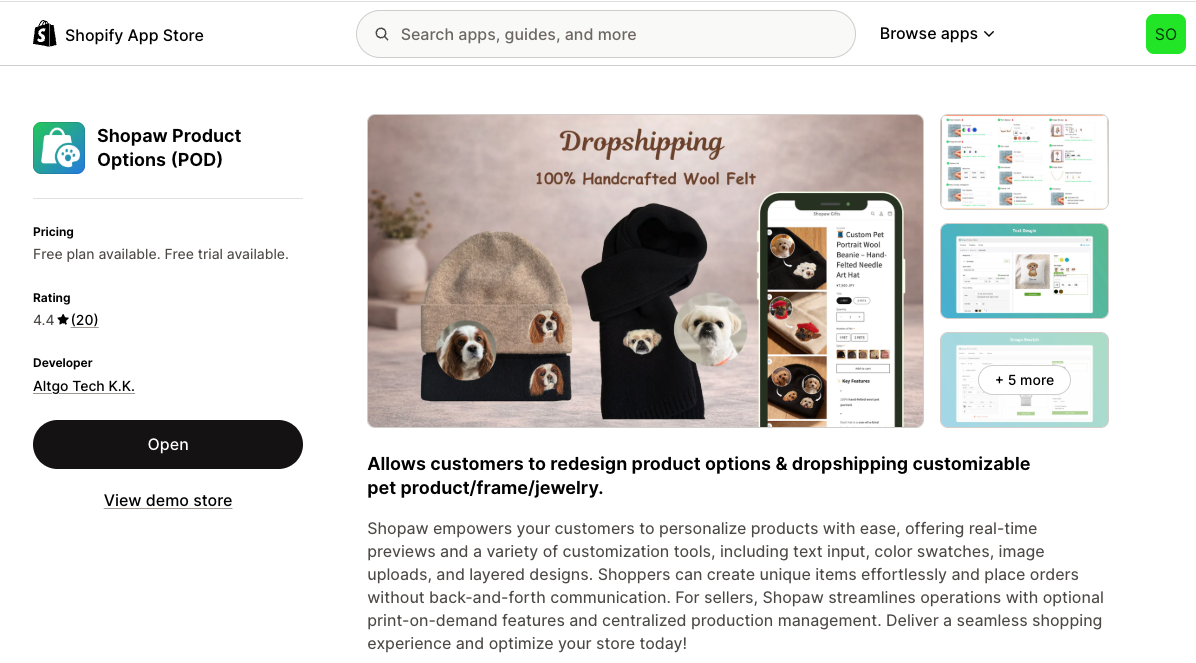
Handsdrop is a supply platform for ecommerce merchants who sell handmade, custom-made products. You run the store on Shopify or Etsy, and Handsdrop handles supply. Once a buyer places an order, the product ships directly from the workshop to the buyer's address. You do not need to hold inventory or get involved in production.
The key difference from standard dropshipping is that Handsdrop products support real personalization. Text content, uploaded photos, and color options are filled in by the buyer on your product page. This information travels with the order to the workshop, where the maker produces the piece accordingly before shipping it out.
What you sell, then, is not a fixed-spec product but something the buyer helped design. For many buyers, that is exactly the appeal.
Step 1: Install the app and connect your Shopify store
For Shopify sellers, the integration process is straightforward. Open your store admin, search for Shopaw Product Options (POD) in the app marketplace, install it, and authorize the connection. The whole process usually takes less than five minutes.
Sellers on Etsy or other platforms currently use a manual order process that does not involve app integration. That workflow is covered in a separate guide.
Step 2: Choose products from the catalog
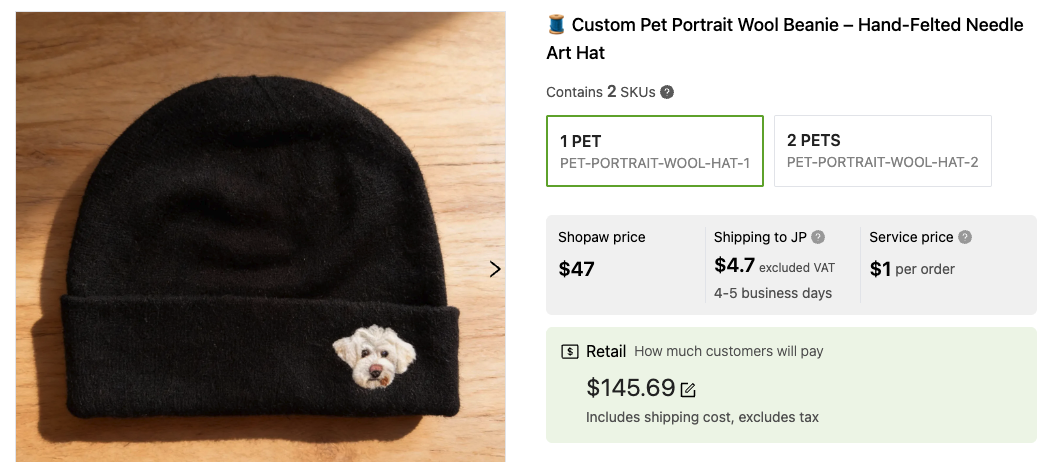
The Handsdrop catalog currently covers needle felt, jewelry, ceramics, and leather carving. Browse through it and pick the products that fit your store's audience.
When selecting, two things are worth paying close attention to. The first is the quality of the product photos, which directly affects conversion on your product page. The second is the base supply price, which determines how much room you have to work with on pricing.
Once you confirm your picks, click "Add to store." The products sync to Shopify automatically, with images, descriptions, and customization options included. You can use them as-is or adjust to match your store's style.
Step 3: Review and adjust the customization options
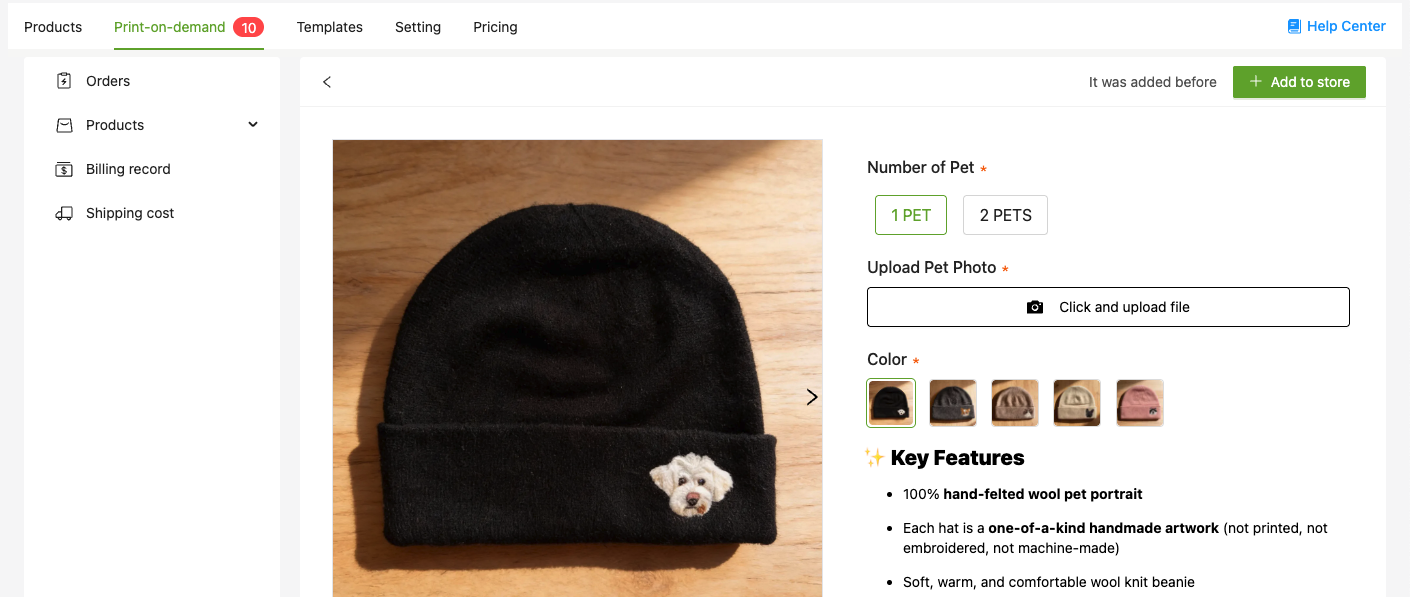
Imported products come with preset customization options by default, typically text input, color selection, and image upload.
Not all of them need to stay on. For a felt ornament, for example, the main customization dimensions are color and text, so the image upload option can be turned off.
Each customization option allows a description underneath, explaining the expected format, any character limits, or the image quality requirements. The more specific these instructions are, the less likely buyers are to submit incorrect information, and the fewer order issues you will need to resolve later. This step often gets skipped, but spending a little time on it pays off.
Step 4: Set your retail price
Handsdrop provides a suggested retail price, but the final price is up to you.
Custom-made products offer more pricing flexibility than standard items. What a buyer pays for personalization is not purely a matter of price. We recommend starting from your margin, the amount left after supply cost, shipping, and platform fees, and then thinking about competitive positioning. If the margin is too thin, higher order volume tends to make things harder rather than easier.
There is no single formula for pricing. It helps to look at comparable products on Etsy for a reference range, and then adjust based on where your store sits in the market.
Step 5: Test the product page before going live
This step is worth keeping in the workflow.
Open the product page in a regular browser and go through the flow as a buyer would: fill in customization details, upload an image if that option is enabled, and add the item to cart. Take note of any step that feels unclear, or any instructions that are confusing even to you.
If you find something, the fix is usually a quick adjustment in the app, around ten minutes or so. Catching issues before launch is much easier than handling buyer questions afterward.
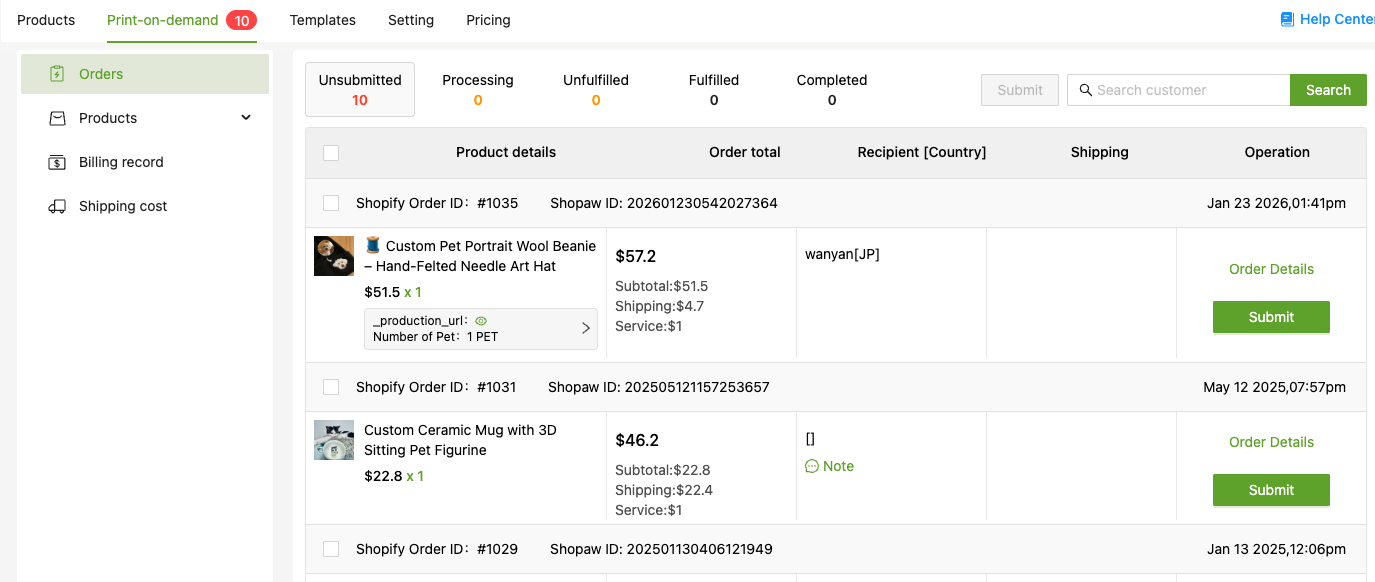
Step 6: Orders run automatically, with no manual shipping work
For Shopify sellers, this part is fully automated. Once the workshop ships the order, the tracking number syncs automatically to the corresponding Shopify order. Buyers can look it up themselves, and you can view the order status from your admin without manual follow-up.
Etsy and other platform sellers currently need to submit order details to Handsdrop manually, including the buyer's customization requests. Once confirmed, the order moves into production, and the tracking number needs to be passed on to the buyer manually as well. The process is a bit more involved, but the structure is the same.
What to do when issues come up
If a buyer reports a quality issue with the product, contact the Handsdrop after-sales team and include photos of the issue. We verify the situation and propose a replacement, exchange, or refund based on the specifics. You do not need to coordinate with the workshop yourself, we handle that side.
For any other questions during the process, customer service is available whenever you need it.